Brawl
Win at scrambler range. Exequror Navy Issue is the apex gunboat; polarized Augoror Navy Issue can catch a lot of people off guard. HAMs are a fairly idiot-proof meat-grinder.
Faction Warfare Cruiser Guide
Web Edition · YC 128
With the release of moderate sites in the Cradle of War expansion and various ISK printing sites in Havoc, cruisers have become a staple of the faction warfare warzone. They decide who keeps the large complexes, who controls the advantage when fighting off small gangs, and are one of the better platforms for player versus player combat.
This guide covers the hulls that you'll often see in the warzone, as well as the common archetypes that they fall into. We highly recommend that players start with destroyers before moving onto cruisers and frigates — see the Frigate Guide and Destroyer Guide.
The vast majority of the knowledge from this guide comes from Dato Koppla, who was kind enough to open up his Pyfa for us!
Cruiser fights are much slower and intentional than destroyer and frigate engagements. Mutual scram and web often commit both pilots: if you slingshot wrong at zero, you will not get those fifty meters back before the DPS race is decided. Since fitting is generally a bit more freeform, this leads to interesting decisions like neutron blasters versus ion blasters.
Whereas frigates are much more of a rock-paper-scissors and destroyers are like a brawl in a pub, cruisers are much more like a dance. Many kite fits can still lose if a competent brawler punches in, and kiters will struggle to hold long point until the fight is over. The Exequror Navy Issue and Vexor Navy Issue punish greedy point holders.
Utility highs matter significantly, much more than they do on frigate and destroyers. The capacitor race can often determine a solo fight, especially if you can turn off their tank or guns. Osprey Navy Issue is a great example of a platform that can abuse this.
Some cruisers are left out of this guide because they were deemed weak or simply outclassed for solo faction warfare fighting.
The guide is written for solo and small-gang pilots stocking contracts or holding plexes. Many of these fits are wrong for large structured fleets. Example fittings are solid representations of each archetype, not the final word — module tier, rig choice, and bling all matter. Check skills and ISK before undocking.
Matchup charts and per-ship cards rate the example fits in this guide against each other (high ground vs low ground when nothing else is in local). Change the plan when you know the fit, the pilot, or the gang. Being predictable is sometimes worse than being slightly suboptimal.
In the world of cruiser fights, pilot skill and knowledge make a far bigger difference than for frigates and destroyers. Things like defanging drones, shooting outside point range and then diving for the point, splitting launchers to confuse a reactive, tactically stopping to prevent slingshotting, choosing to either get under guns or scram kite — these can all decide a fight. As a result, take this matchup chart with a grain of salt.
Win at scrambler range. Exequror Navy Issue is the apex gunboat; polarized Augoror Navy Issue can catch a lot of people off guard. HAMs are a fairly idiot-proof meat-grinder.
Hold outside of the range they can apply DPS at. Omen Navy Issue, laser boats, and rail boats are generally staples.
Cap them out or out-rep them while you hold them down. Vexor Navy Issue is disgusting for this, and the Osprey Navy Issue can land some cheeky wins with dual neutralizers.
Take free trades, AB out or flash-tank the beacon when local is wrong. Scythe Fleet Issue and Stabber Fleet Issue are often seen doing this.
Matchup charts are available on desktop.
High ground Low ground
| High ground vs Low ground | Blaster Exequror Navy Issue | Dual Rep Vexor Navy Issue | Polarized Augoror Navy Issue | HAM Caracal Navy Issue | 2X Neut HAM Osprey Navy Issue | Brawl Arbitrator | Dual Prop Stabber Fleet Issue | Dual Prop Scythe Fleet Issue |
|---|---|---|---|---|---|---|---|---|
| Blaster Exequror Navy Issue | ||||||||
| Dual Rep Vexor Navy Issue | ||||||||
| Polarized Augoror Navy Issue | ||||||||
| HAM Caracal Navy Issue | ||||||||
| 2X Neut HAM Osprey Navy Issue | ||||||||
| Brawl Arbitrator | ||||||||
| Dual Prop Stabber Fleet Issue | ||||||||
| Dual Prop Scythe Fleet Issue |
High ground Low ground
| High ground vs Low ground | Long Point Arbitrator | Pulse Augoror Navy Issue | Kite Omen Navy Issue | 250mm Rail Exequror Navy Issue | RLML Osprey Navy Issue | Armor RLML Scythe Fleet Issue | Vulcan Stabber |
|---|---|---|---|---|---|---|---|
| Long Point Arbitrator | |||||||
| Pulse Augoror Navy Issue | |||||||
| Kite Omen Navy Issue | |||||||
| 250mm Rail Exequror Navy Issue | |||||||
| RLML Osprey Navy Issue | |||||||
| Armor RLML Scythe Fleet Issue | |||||||
| Vulcan Stabber |
High ground Low ground
| High ground vs Low ground | Brawl Arbitrator | Pulse Maller | Beam Omen | Neut Vexor | XLASB HAM Bellicose | AB XLASB Stabber |
|---|---|---|---|---|---|---|
| Brawl Arbitrator | ||||||
| Pulse Maller | ||||||
| Beam Omen | ||||||
| Neut Vexor | ||||||
| XLASB HAM Bellicose | ||||||
| AB XLASB Stabber |
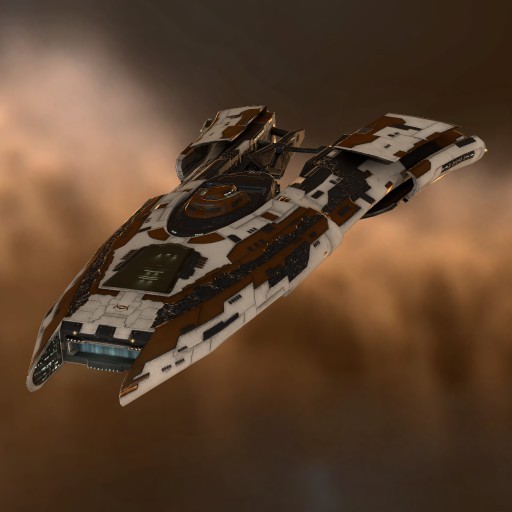
Amarr Cruiser · Arby
Drone DPS with a flexible layout: kite, AB brawl, or TD support.
One of the strongest overall T1 cruisers on the list: drones carry the DPS, and the slot layout lets you choose kite, brawl, or gang support without changing hulls. Fitting space is forgiving. Speed is not — be wary of cruisers that can ram you.
Shield and armor are both viable. Shield pushes DPS and often drops the TD for missile highs; armor keeps the TD and accepts worse speed. Drones do the work at range.
Abuse blaster and laser boats that have to apply through disruptors and neutralizers.
Great for defending plexes, although you generally won't get many kills solo. Use this to learn the basics, capture some complexes, and perhaps participate in a small gang.
Example fittings for each role above. Copy into Pyfa / EFT, then tune for your skills and contracts.

MAAR long-point drone kite with RLMLs, medium neut, and a tracking disruptor.
AB 1600 plate brawler with dual medium neuts, dual nos, and a tracking disruptor.
MWD armor buffer with dual tracking disruptors for small-gang / fleet support. Do not expect solo kills.
Shield XLASB long-point drone kite with light missiles.

Hold range; drones and projected control do the work.

They are slow. Stay at point and grind.

Lower DPS line — do not greed into scram range.
Point-range contest. Drones versus Vulcans — do not greed.

They want scramble. Deny the close.

Missile kite clips you if they hold band. Leave early.

They catch you. Leave before the ram lands.

Low-commit catcher with speed. Bail early.
Speed and leave tools win. Bail early.

Same story — do not get rammed.
100MN AB shield buffer, LMLs, small neut, drones.
Neuts and drones buy time while their polarized race burns them.

Active laser trade into your buffer. Hold zero and grind.
Establish control early and grind. Neutrons hurt if you botch the open.
Even trade. Respect their dual-prop leave.
Even. Respect XLASB and AB out.

Do not take this for fun. Warp.
Rage buffer deletes you. Warp.
Neuts plus HAM — you lose hard. Warp.
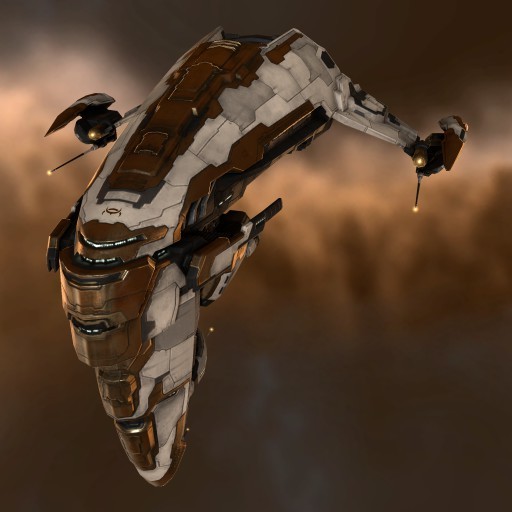
Amarr Cruiser · Maller
Underrated pulse brick: eight-hundred plate and real DPS.
Underrated, not underpowered. Think mini Augoror Navy for plex protection and small gang: respectable DPS on a heavy plate without Navy Issue cost.
Do not max-plate into uselessness — eight hundred with pulse is the line. Soft into neuts and anything that gets under your tracking.
Example fittings for each role above. Copy into Pyfa / EFT, then tune for your skills and contracts.
MWD 800mm plate pulse brick for plex defense and small gang.
MWD 800mm plate pulse brick.
Load Conflag
Hold the plex and apply.

Load Conflag
T1 buffer race in your favour if you land pulse clean.
Load Conflag
Brick versus brick. Tracking and heat decide it.
Load Conflag
Neuts and drones grind plates. Leave if control sticks.

Load Conflag
Cap wall ends laser bricks. Warp.
Load Conflag
Navy stat check. Disengage or bring friends.
Load Conflag
Same hull family, much more damage. Decline.
Load Conflag
You will not break the active wall.
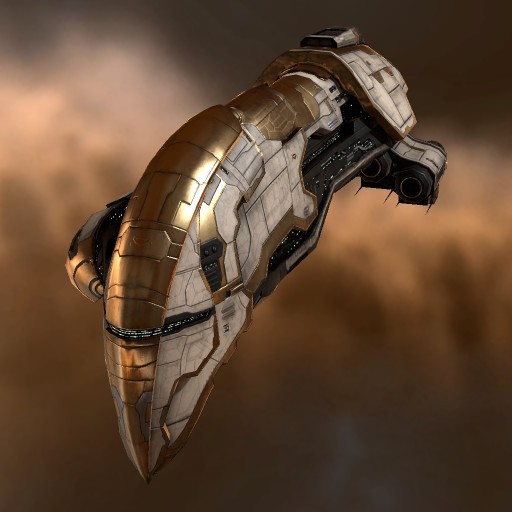
Amarr Cruiser · Omen
Underrated laser T1: quad lights, kite pulse, and plex snipers.
Underrated platform. You clear most T1 cruiser and destroyer work; Navy Issues usually end you in a straight trade. Prefer afterburner on the short-range lines for tracking.
Odd guns: low fitting, short range, high DPS — think dual one-fifty rails for lasers — with room for a sixteen-hundred plate.
Same idea as Pulse Augoror Navy Issue at T1 budget. Hold range; do not greed into scram.
Forces people off a plex more than it solos kills. Hard to fit; useful projection in a small gang.
Example fittings for each role above. Copy into Pyfa / EFT, then tune for your skills and contracts.
MWD 1600 plate with five Quad Light Beam Lasers for short-range DPS.
MWD scram/web heavy pulse kite — AugNI pattern on a T1 hull.
Heavy beam long-point plex protector with MAAR.
1600 plate, five Beam Omen Lasers, scram/web.
Load Gleam
Short-range DPS wins if you land the open.
Load Gleam
Buffer race. Heat and drones decide it.
Load Gleam
Laser brick mirror. Tracking matters.
Load Gleam
Neuts buy them time. Do not sit forever.
Load Gleam
Cap pressure ends you. Leave.
Load Gleam
Navy stat check. Leave.
Load Gleam
Rage buffer wins fair scram trades.
MWD scram/web heavy pulse — AugNI kite pattern on T1.
Load Scorch
Hold range; T1 kite should own the open.
Load Scorch
Deny scramble. Clip them down.
Load Scorch
Both want point range. Drones versus pulse — heat decides.
Load Scorch
They catch Navy kiters. You are thinner.
Load Scorch
Do not take the ram in a T1 pulse kite.

Load Scorch
Same job, better hull. Decline even trades.
Heavy beam long-point plex protector with MAAR.
Load Aurora
Force them off the plex more than you solo-kill.
Load Aurora
Projection contest — beams should win if you hold point.
Load Aurora
Once they land scram you are done. Warp.
Load Aurora
Low-commit catcher with more speed. Leave early.
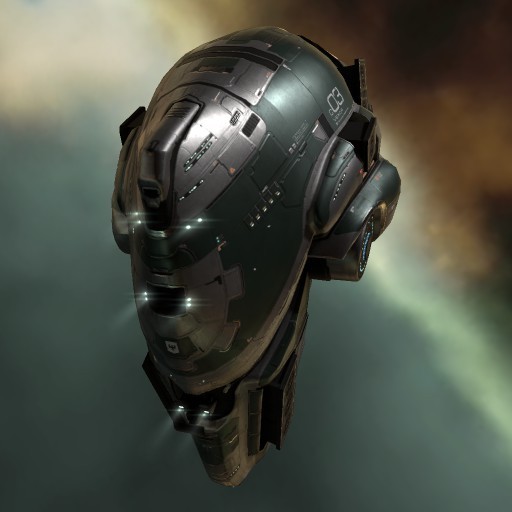
Gallente Cruiser · Vexor
Neut-plate plex defender; blaster trade fit for T1 work.
Strong high-ground T1. Soft at punching into kiters, excellent when they punch into you. Cap warfare plus plate wins a lot of zero-range trades. Subpar for organized small-gang damage application — drones derp when the grid is busy.
Sixteen-hundred plate and a neut stack. Caps out many active gunboats that slide in. Prefer defending a plex over chasing.
Bulkheaded blaster with a medium neut. Wins most T1 mirror work; Navy Issues still end you.
Example fittings for each role above. Copy into Pyfa / EFT, then tune for your skills and contracts.
1600 plate plex holder with multi-neut highs and heavy drone DPS.
Hull-tank Neutrons with dual webs, medium neut, and transverse bulkhead rigs.
1600 plate plex holder with multi-neut highs and heavy drones.
Neuts on, hold zero, grit the buffer.
Cap wall ends laser bricks that slide in.
Same — establish neuts early.
Hold when they punch into you and misplay.
T1 control fight. Drones versus neuts.
Close — respect leave tools.
Same. Do not chase the AB out.
You will not catch them. Sit or leave.
Dedicated kite never enters neut range.
Low-commit pressure outside your job.
Hull-tank Neutrons with dual webs, medium neut, and bulkhead rigs.
Load Void
Wins most T1 mirror work.
Load Void
Scram race into a T1 missile boat.
Load Void
Close and apply. Neuts help if they linger.
Load Void
Same job.
Load Void
Control fight. Watch their neut.
Load Void
Navy Issue still ends you.
Load Void
Rage buffer. Decline fair trades.
Load Void
Sister hull with dual reps. Warp.
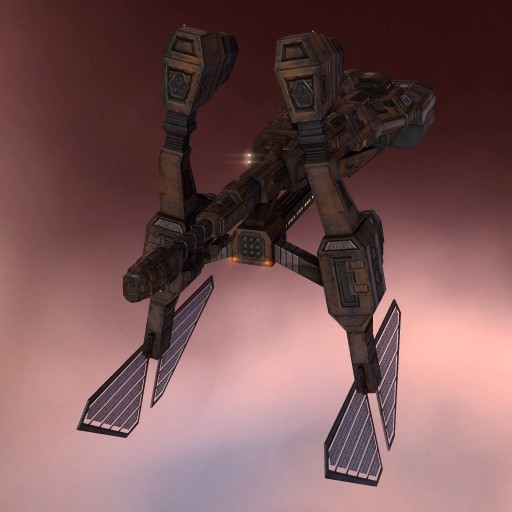
Minmatar Cruiser · Bellicose
Cheaper Caracal energy: HAM grinders and XLASB plex work.
Contract workhorse. HAM plus point and drones for simple fleet and meat-grinder work; XLASB for high-ground plex defense. Not the sharpest pure solo hull, but it stocks cleanly and wins the fights T1 should win.
Idiot-proof apply for gangs and meat-grinders. Skip it when you want dedicated solo work.
Plex protector with flash tank. Covers most T1 and small-hull gates; can punish faction kiters that greed into you.
Example fittings for each role above. Copy into Pyfa / EFT, then tune for your skills and contracts.
Cheap four-HAM shield scram brawler with Hammerheads.
AB XLASB HAM plex protector — cheap Caracal Navy Issue stand-in with scram/web.
Cheap four-HAM shield scram brawler with Hammerheads.
Load Rage
Idiot-proof apply for gangs and meat-grinders.
Load Rage
T1 laser brick — scramble and grind.
Load Rage
Same job.
Load Rage
Control versus buffer. Heat decides.
Load Rage
Not your solo fight. Decline.
Load Rage
Same role, better hull.
XLASB HAM Bellicose plex protector — trade a LSE for the ancillary.
Load Rage
Flash-tank beacon fight. Boost correctly.
Load Rage
Hold the beacon; cover most T1 opens.
Load Rage
Buffer race. Do not overheat incorrectly.
Load Rage
Close T1 control fight.
Load Rage
Neuts grind flash tanks. Leave if dry.
Load Rage
Can punish greedy point holds if they slide in wrong.
Load Rage
Close if skill gaps are large. Respect leave tools.
Load Rage
Same — flash tank versus leave-insurance.
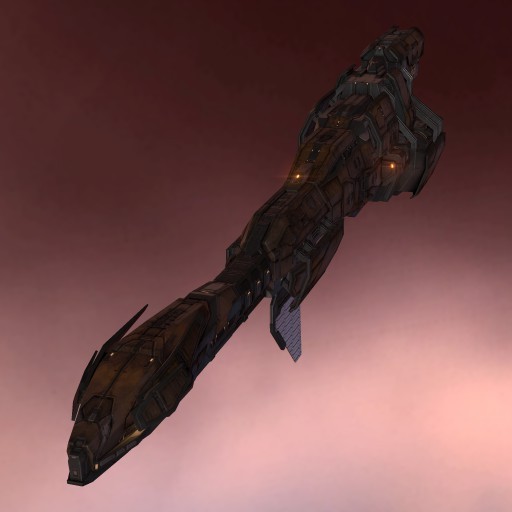
Minmatar Cruiser · Stabber
AB XLASB plex hold and Vulcan half-kite — never MWD scram.
Same job family as Bellicose for plex defense, with projectile rate of fire and falloff instead of missiles. Strong against T1 cruisers; can get under laser boats. Never fit microwarpdrive plus scram for solo — you will lose more than you win, even into Navy kiters, because the tank is too thin.
Plex protector with real brawl stats and neut highs for frigate and destroyer gangs. Some Scythe Fleet Issues are stealable if you catch scram on a microwarpdrive fit.
Shield kite with point and a rapid light. Stay at range, defend the plex, die for the kill only when you choose to.
Example fittings for each role above. Copy into Pyfa / EFT, then tune for your skills and contracts.
AB XLASB plex protector — do not MWD-scram in this hull. Hold the beacon and leave when you must.
MWD long-point Vulcan kite with twin LSE and twin RLML.
AB XLASB Stabber plex protector — never MWD-scram this hull.
Load Hail
AB control, get under lasers when you want it.
Load Hail
T1 trade. Tracking helps you under guns.
Load Hail
Flash-tank beacon fight.
Load Hail
Neuts and drones grind you. Leave if control sticks.
Load Hail
Cap wall. Do not invent hero moments.
Load Hail
Stealable if you catch scram on their MWD fit.
Load Hail
Navy brawler. Warp.
Load Hail
Do not invent Navy hero moments.
Load Hail
Beacon brick deletes you.
MWD long-point Vulcan kite with twin LSE and twin RLML.
Load Barrage
Sister hull — stay at range, defend the plex.
Load Barrage
Point-range contest. Drones versus Vulcans — even.
Load Barrage
Half-kite should own a committed flash tank if they misrange.
Load Barrage
Navy mid-band. Die for the kill only when you choose to.
Load Barrage
They catch you. Warp.
Load Barrage
Low-commit catcher. Leave early.
Load Barrage
Fatter kite with XLASB — they are favoured into T1. Decline fair trades.
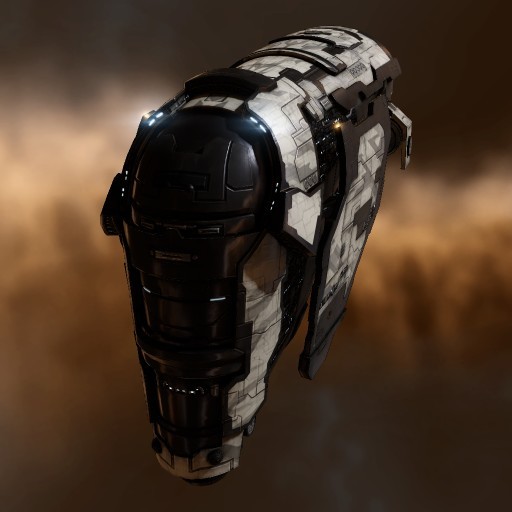
Amarr Cruiser · AugNI
Polarized apex predator, or Pulse Augoror Navy Issue when you want to live.
Strong solo Navy Issue. The armor HP bonus is what makes polarized play real, and the same frame carries a safer Scorch kite with medium neuts in the utility highs. Pick aggression or stay-alive; both are first-rate.
Raw HP plus absurd DPS at zero. Sit on the beacon and delete whatever punches in. Best with high ground. Mix drone types into reactive hardeners or you shred yourself.
Pulse and Scorch around thirty kilometres. Medium neuts are defensive when someone rams you and offensive when you close. Faster than a VNI; lower risk, lower reward — hard to kill you.
Example fittings for each role above. Copy into Pyfa / EFT, then tune for your skills and contracts.
Dual 1600 polarized heavy pulse zero-range brawler with scram/web.
MAAR pulse kite with Scorch, double medium neuts, and long point.
Dual 1600 polarized heavy pulse, scram/web, high ground preferred.
Load Conflag
Even buffer race. High ground and heat decide it.
Load Conflag
Reactive eats polarized DPS. Leave.
Load Conflag
Hold the beacon and melt.
Load Conflag
Neuts hurt. Win fast or leave before you dry.
Load Conflag
Punish the punch-in before they AB out.
Load Conflag
Neuts and drones eat polarized opens. Do not ego this.
Load Conflag
They get under guns and speed-tank. Leave if the race turns.
MAAR Scorch pulse ~30 km with double medium neuts and long point.
Load Scorch
You are faster; do not get webbed down at zero.
Load Scorch
Hold mid-band; they want scramble.
Load Scorch
Similar job — your neuts help if the race closes.
Load Scorch
Hold band and pressure — you are favoured into this clipper.
Load Scorch
Range discipline. Do not greed into their drones.
Load Scorch
Catch tools and speed will find you.
Load Scorch
They run you down. Leave early.
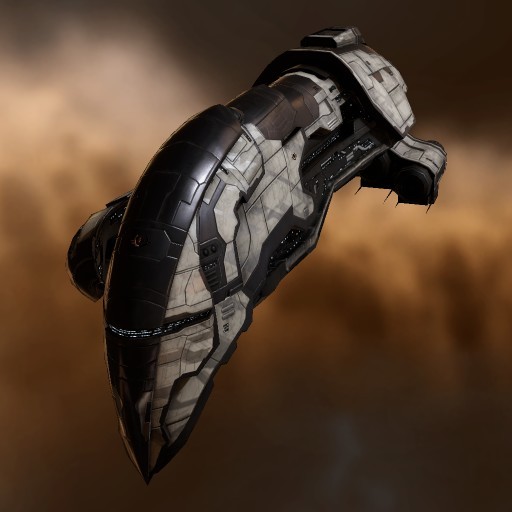
Amarr Cruiser · OmenNI
Mid-range kite is top tier; beam sniper covers plex denial.
If you are flying Omen Navy, you are usually kiting at mid range. That pulse kite line is the hull's job and the gold standard — no closer-range pulse variant. Beam sniper covers plex denial and gang projection.
The top solo reason to undock this hull. Hold mid-band with Scorch, manage capacitor, and do not greed point into a scram.
Longer band for plex denial and gang projection.
Example fittings for each role above. Copy into Pyfa / EFT, then tune for your skills and contracts.
MAAR Scorch pulse kite with long point and a small neut.
Heavy beam mid-range kite with long point for plex flex.
MAAR Scorch pulse kite with long point and a small neut.
Load Scorch
Hold mid; do not greed point into a scram.
Load Scorch
Deny scramble. Clip the buffer at range.
Load Scorch
Bleed them if you never enter web range.
Load Scorch
They are a beacon brick. Stay out.
Load Scorch
Mid-band versus long-point drones. Range discipline.
Load Scorch
Navy mid-band owns this kite — hold band first.
Load Scorch
Catch tools win. Leave early.
Load Scorch
Speed and leave tools. Warp before the ram.
Load Scorch
Low-commit catcher. Do not sit forever.
Heavy beam mid-range sniper with long point.
Load Aurora
Plex denial — force them off the beacon.
Load Aurora
Projection should carry if you hold point.
Load Aurora
Same idea — do not let them scramble free.
Load Aurora
Once Neutrons land you are dead. Warp.
Load Aurora
They out-range-threat and outspeed. Leave early.
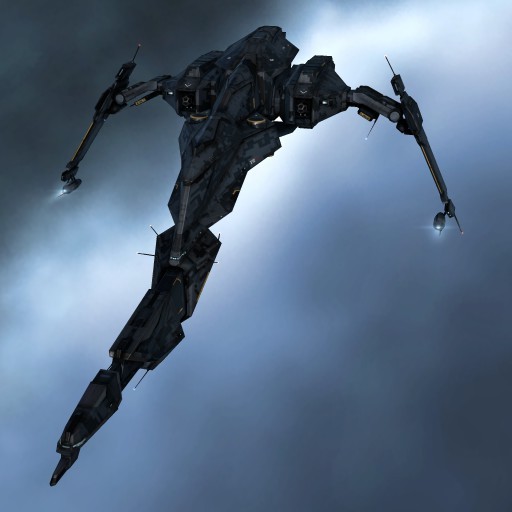
Caldari Cruiser · CNI
Idiot-proof HAM brawler — top tier for new pilots.
Generous fitting, huge buffer, Rage that applies. One of the best "click approach and win" Navy Issues for pilots who need a simple ship that still works at the top of the meta. Skip T1 Caracal — fly this instead.
Full tackle, HAM Rage, fat tank. Soft into dedicated kiters and into VNI reactives you cannot break.
Example fittings for each role above. Copy into Pyfa / EFT, then tune for your skills and contracts.
Idiot-proof six-HAM shield brawler with scram/web.
Six-HAM shield brawler with scram/web.
Load Rage
Scram, apply Rage, win the buffer race.
Load Rage
Idiot-proof open into a T1 laser brick.
Load Rage
Hard win — buffer and apply delete the T1 control fit.
Load Rage
Tough buffer race — high ground helps.
Load Rage
Their neuts tip the trade. Leave if dry.
Load Rage
Reactive stalls you. Do not sit forever.
Load Rage
If they hold range you struggle. Heat and hope, or leave.
Load Rage
Committed kite. You need a misrange to land.
Load Rage
Low-commit catcher bleeds you. Decline.
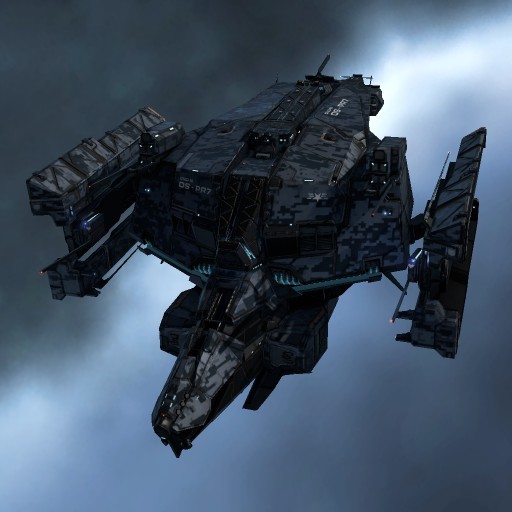
Caldari Cruiser · OspreyNI
Mixed hardpoints: double-neut HAM and RLML kite.
Three launchers leave two utility highs, six mids, and four lows. That layout is the hull's whole strength. Harder to fly and tighter to fit than Caracal Navy Issue. In solo, the neuts matter more than the raw DPS gap.
Medium neuts let you take Caracal Navy Issues and put real pressure on Vexor Navy Issue when the trade goes right.
Kinetic-favoured missile damage and velocity bonus clip into kiting cruisers with a very large XLASB tank. Anything that catches you is scary — leave early.
Example fittings for each role above. Copy into Pyfa / EFT, then tune for your skills and contracts.
Three HAM launchers and two medium neuts — the one-on-one pressure line versus gunboats and VNI.
RLML long-point kite with XLASB, scram, and dual small neuts for solo plex work.
Three HAM launchers and two medium neuts.
Load Rage
Neuts tip the trade.
Load Rage
Cap pressure plus HAM — finish before they melt you.
Load Rage
Hard win — cap them, then grind.
Load Rage
Equal-to-favoured — pick the trade and finish before they AB out.
Load Rage
Neuts help; Neutrons still hurt. High ground matters.
Load Rage
Possible with neut pressure. Do not scramble yourself.
Load Rage
Winnable if neuts stick. Watch their AB out.
RLML long-point kite with XLASB.
Load Fury
Clip the T1 drone kite if you hold point.
Load Fury
Favoured into T1 half-kites — hold band and apply.
Load Fury
Clip into the brawler if you hold point.
Load Fury
Same — deny zero.
Load Fury
Navy mid-band with neuts. Decline fair trades.
Load Fury
Same job, better projection fight for them.
Load Fury
Mid-band rails pressure you. Leave if they own band.
Load Fury
Primary counter. Do not get caught.
Load Fury
They close. Leave early.
Load Fury
They are the catcher in this matchup.
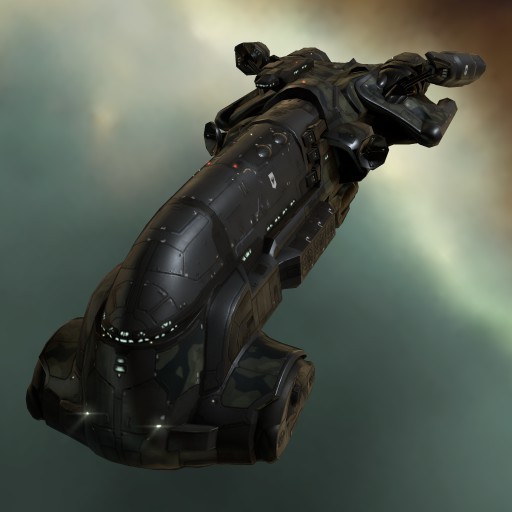
Gallente Cruiser · ENI
Still top tier: free plate feel, scram-edge falloff, Neutrons.
Even after the nerfs, still the navy cruiser to beat. Plate mass reduction makes a sixteen-hundred feel nearly free. Falloff keeps Neutrons applying at the edge of scram. Prefer Neutrons over ions: once both ships land scram and web, a bad slingshot ends the fight, and neutrons forgive more.
Double web, sixteen-hundred plate, Neutrons, enough speed to close kiters. Soft into VNI active tanks.
More useful in a small gang than solo. Good plex defense on the same mid-band profile as other Navy kiters. Tracks cruisers; struggle against smaller hulls.
Solo plexing and militia fleet. Double plate buffer with electrons for frigate and destroyer blobs.
Example fittings for each role above. Copy into Pyfa / EFT, then tune for your skills and contracts.
Neutron plate brawler with double web and a small nos. Prefer Neutrons over ions.
250mm rail plex / gang flex — hold range without giving up the ENI tank skeleton.
Dual 1600 electron blob / mass fight line.
Neutron plate brawler with double web and a small nos.
Load Void
Even buffer race. High ground and heat decide it.
Load Void
You have the speed. Close, scram, apply.
Load Void
Catch tools win. Punch in before they leave.
Load Void
Ram the kite. Do not orbit at their drone comfort.
Load Void
Close hard. Their XLASB only buys time.
Load Void
You are the harder trade — force the scram.
Load Void
They cannot speed-tank Neutrons cleanly.
Load Void
Buffer race. High ground and heat decide it.
Load Void
Watch neuts. Win fast or leave dry.
Load Void
Their control fit eats you if neuts stick. Do not ego.
Load Void
They tank you. Do not die for pride.
250mm rail plex / gang flex on the ENI tank skeleton.
Load Spike
Mid-band plex hold clears most low-tier opens.
Load Spike
Same mid-band job — rails should pressure.
Load Spike
Mid-band profile match. Tracking and heat.
Load Spike
Same story. Cap and band discipline.
Load Spike
Bleed if you hold range; do not get webbed to zero.
Load Spike
Both want low-commit pressure. Leave if they own band.
Load Spike
Sister hull with Neutrons — decline the close trade.
Dual 1600 electron blob / mass-fight line.
Load Void
Blob buffer wins if they commit into you.
Load Void
Mass-fight apply into T1 flash tanks.
Load Void
Solo reactive wall is still not your job.
Electrons and double plate exist for this.
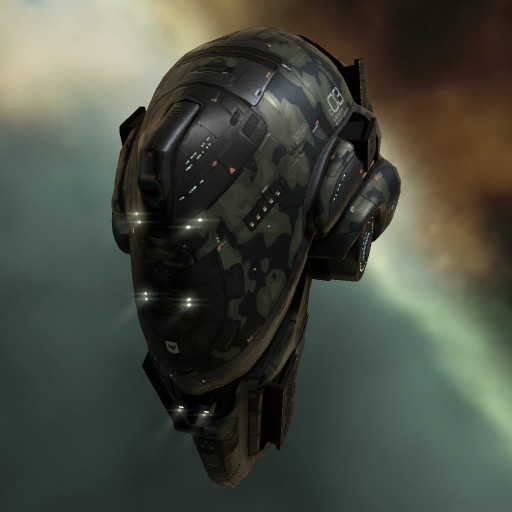
Gallente Cruiser · VNI
Dual-rep landlord: barely loses a scram fight without neuts-plus-DPS.
The hull other people hate punching into. Once you land scram, you win most straight trades. Kiters can theoretically bleed you, but holding two kilometres a second for the whole booster stack is hard. Double cap booster for solo. Weak once frigates and destroyers defang your drones.
Dual reps, reactive, prefer double cap booster. Cheap drugs make the active wall absurd. Heavy neut stacks are the honest answer — and even then the trade is messy.
Example fittings for each role above. Copy into Pyfa / EFT, then tune for your skills and contracts.
Dual-rep reactive ion VNI with scram/web and a medium cap booster.
Dual-rep reactive electron with double medium cap boosters.
Load Void
Hold close, manage boosters, win the bleed.
Load Void
Reactive eats polarized. Scram clean and smirk.
Load Void
Once you land scram you win most straight trades.
Load Void
Do not let them speed-tank forever — hold scramble.
Load Void
T1 control into your wall. Manage boosters.
Load Void
Heavy neut + DPS is the honest answer — and even then messy.
Load Void
T1 neut stack can pressure. Win the cap race or leave.
Load Void
They can bleed you in theory — holding 2 km/s for the whole stack is hard.
Load Void
Low-commit kite. Force a scramble or decline.
They defang drones. Warp before the swarm finishes you.

Minmatar Cruiser · ScytheFI
Dual-prop leave-machine; armor RLML for low-commit plex (XLASB RLML refit).
Nearly three kilometres a second cold on dual prop with a flash tank that lets you commit, then leave. That leave button is the hull's whole identity.
Run people down on microwarpdrive; afterburner out when the tank collapses. Default punch-and-leave solo tool.
Armor tank, medium neut, roughly sixty kilometres of low-commit pressure — the common solo RLML meta line. Excellent plex defense: faster than almost everything, and filthy against frigate tackle gangs. Refit: RLML XLASB Scythe Fleet Issue for the shield flash-tank kite when you want XLASB leave tools instead of plate/MAAR.
Example fittings for each role above. Copy into Pyfa / EFT, then tune for your skills and contracts.
Primary dual-prop leave-insurance: MWD + AB XLASB with Dual 180mm ACs.
Primary RLML line: 800 plate MAAR long-point with medium neut. Refit: RLML XLASB (shield flash kite).
Refit of Armor RLML: four RLML + XLASB long-point kite with a small neut.
MWD + AB XLASB Stabber leave-insurance with Dual 180mm ACs.
Load Hail
Punch in; leave if the trade turns.
Load Hail
You are the catcher. Run them down.
Load Hail
Close the kite; leave if wrong.
Load Hail
Same — speed is the identity.
Load Hail
Punch the beacon brick and AB out if polarized wins.
Load Hail
Free trades into T1 control.
Load Hail
Take the free open; leave if flash tank holds.
Load Hail
Equal-to-unfavoured — their neuts tip the trade. Leave early.
Load Hail
Respect them. Take free shots or warp.
Load Hail
Soft into Stabber Fleet. Respect the web and plate.
Load Hail
Possible if you never commit past leave. Do not sit in reps.
Low-commit ~60 km RLML with medium neut. Refit: RLML XLASB Scythe Fleet Issue.
Load Fury
You are the catcher in this matchup.
Load Fury
Favoured into T1 kite — low-commit pressure with speed.
Load Fury
Favoured into T1 — projection and speed should carry.
Load Fury
Same mid-band story — you usually force the leave.
Load Fury
Clip the brawler; do not greed into scramble.
Load Fury
Low-commit versus mid-band rails.
Neut the landers; clip them down.
Load Fury
Their mid-band and neuts favour them. Leave early.
Load Fury
If they punch clean, leave — do not invent a dual-prop race.
Four RLML + XLASB long-point kite with a small neut (Armor RLML Scythe Fleet Issue refit).
Load Fury
Range trade when you do not want the dual-prop AC commit.
Load Fury
Missile versus drone kite. Band discipline.
Load Fury
Projection contest. Leave if they own mid-band.
Load Fury
Once they land you are in trouble. Warp.
Load Fury
Sister line — armor has the neut reach.

Minmatar Cruiser · StabberFI
Fairly weak, still useful: dual-prop plate for range control.
The hull has problems and sits mid on pure charts. Fly it anyway for Minmatar Fleet identity and for tools Scythe Fleet Issue lacks — especially a web and better guaranteed-brawl presence. Speed tank under guns; do not expect to beat a serious VNI in a held scramble.
Dual prop, sixteen-hundred plate, autocannons. Strong against laser boats if you get on top; can punch up into some battlecruisers. Prefer this over Scythe Fleet when the fight is a guaranteed brawl or a smaller gang.
Example fittings for each role above. Copy into Pyfa / EFT, then tune for your skills and contracts.
MWD + AB 1600 plate Vulcan for range control and punching up.
MWD + AB 1600 plate Vulcan for range control and punching up.
Load Hail
Get under guns; speed tank the projectiles back.
Load Hail
Close laser kiters. Prefer guaranteed brawl over Scythe Fleet chasing.
Load Hail
Same — get on top.
Load Hail
Laser boat under Vulcans.
Load Hail
T1 laser brick — scrub them.
Load Hail
You are the harder dedicated brawl.
Load Hail
Winnable. Watch neuts.
Load Hail
Tough buffer race.
Load Hail
Even trade into T1 control — respect neuts and drones.
Load Hail
Do not take the straight brawl.
Load Hail
You cannot speed tank their apply. Leave.
Written by Dato Koppla. The links below cover sibling hull guides, plex fundamentals, and deeper yearly data when you want another angle.




/alliance/ 
/learning-center/ /learning/ /alliance/story/ /alliance/values/ /alliance/content/ /brand/ /legal/privacy/ /legal/terms/ /campaigns/etherium-reach/ /campaigns/auga-yc128/ /warzone/ /warzone/yc128-07/ /warzone/yc128-08/ /warzone/yc128-09/ /amamake-market/ /amamake-market/yc128-08/ /amamake-market/yc128-09/ /campaigns/providence/ /campaigns/scalding-pass/ /campaigns/hek/ 
/alliance/corporations/ /alliance/corporations/associates/ /alliance/tribes/ /alliance/tribes/?tribe=capitals /alliance/tribes/?tribe=supply /alliance/tribes/?tribe=supply /alliance/tribes/?tribe=pulse /guides/ /learning/guides/navy-destroyer-metagame/ /learning/guides/navy-frigate-guide/ /learning/guides/faction-warfare-cruiser-guide/ 
/alliance/content/ 
/ships/ 
/ships/fittings/ 
/ships/doctrines/ 
/market/ 
/market/freight/calculator/ /market/freight/contracts/ /market/freight/contracts/history/ /market/buyback/ /market/buyback/contracts/ /market/buyback/stocks/ /market/buyback/orders/ /market/buyback/contracts/history/ /market/ops/ /market/ops/contracts/ /market/ops/sell_orders/ /market/fitting_orders/ 
/industry/ /industry/orders/ /industry/orders/history/ /industry/orders/summary/ /industry/blueprints/ /industry/blueprints/copies/ /industry/products/ 
/intel/combatlog/